Transformations
We can move, scale, and rotate objects, collectively called transformation.
| Action | Description |
|---|---|
G |
Grab (move, translate) |
S |
Scale (resize) |
R |
Rotate |
LMB or Enter |
Confirm transformation |
RMB or Esc |
Cancel transformation |
Exercise: experimenting with transforms
- Move, rotate, scale the cube to get used to the controls
- Note the changing numbers in the lower left corner of the 3D View
Coordinates show the tranformation values (here, a move operation)
- Use
Ctrl-Zto undo and get the cube back to the origin.
Constrain a transformation
Immediately after pressing G, S, or R we can constrain the
transformation to a particular axis by hitting the key for that axis
| Action | Description |
|---|---|
X (immediately after initiating transform) |
Constrain transformation to X axis |
Y (immediately after initiating transform) |
Constrain transformation to Y axis |
Z (immediately after initiating transform) |
Constrain transformation to Z axis |
MMB (while moving the mouse) |
Constrain to last-moved-in direction |
Ctrl (while moving the mouse) |
Snap to the grid |
Shift (while moving the mouse) |
Fine-tune the transformation (10x slower) |
Exercise: constrained transforms
- Make the cube taller (
S,Z) - Move the cube back 5 units (
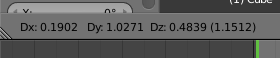
G,Y, holdCtrland pay attention to the numbers at the bottom left)

The stretched cube, in the process of being moved back in the Y direction 5 units.
Type numbers to be more precise
One way of making precise transformations is to type numbers after choosing a transformation axis.
| Action | Description |
|---|---|
number keys (immediately after initiating transform) |
Precise entry of transformation |
Exercise: numerical transforms
- Rotate the cube around the Y axis by 45 degrees (
R,Y,45,Enter).
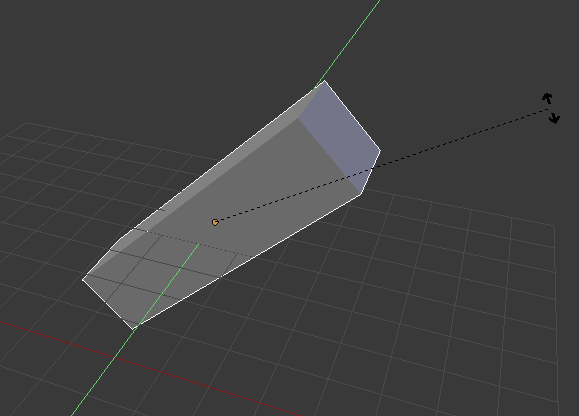
The stretched cube, in the process of being rotated 45 degrees
Properties shelf
In the Properties Shelf, we can type in exact values for the position of an
object. Toggle the shelf on and off with N (think “numbers”).
| Action | Description |
|---|---|
N |
Toggle the Properties Shelf |
Exercise: precision transforms
- Using the Properties Shelf, reset the cube to its original location (0, 0, 0), rotation (0, 0, 0), and scale (1, 1, 1)
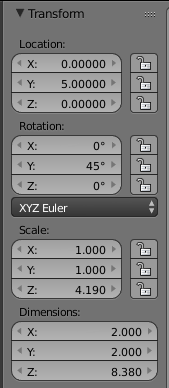
Properties before resetting transforms

Properties after resetting transforms
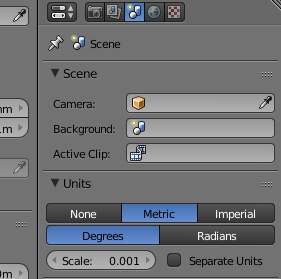
Units
For 3D printing, we want to be able to relate what we do in Blender to the real world. By default, Blender uses arbitrary “Blender units”: one unit per grid square. Let’s set the units to millimeters.
Exercise: setting units
- In the Properties panel (far right of the interface), click the button for Scene Properties (see figure below)
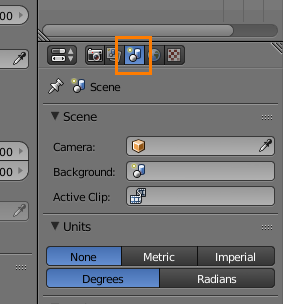
Scene properties (after clicking highlighted button)
- Click , and enter into the “Scale” text box. Now one “Blender unit” will be equivalent to 0.001 meters or 1 mm.
After setting units to millimeters
- In the Properties Shelf (the one toggled by
N), look for the section. It may be folded up, so click the arrow to unfold it. - Enter into the “Scale” text box. This makes the background grid use millimeters as well.
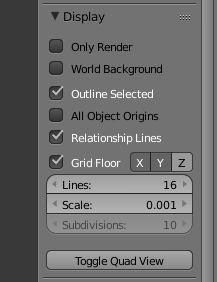
Set the scale of grid lines to be 0.001 units (mm) as well.
Note
If importing a file that someone else created, you may have to reset the units. You may find yourself doing this a lot . . .