Mesh problems and solutions
Printer limitations require meshes to meet certain criteria. These criteria depend on the printer and material, but Blender has tools to help troubleshoot and spot issues before sending to the printer.
3D Print Toolbox
Blender has many available Add-ons or plugins. By default, not all are pre-loaded. One of these is the 3D Print Toolbox, which we have to enable.
Exercise: enabling the 3D Print Toolbox.
- (or
Ctrl-Alt-U) to open the User Preferences menu. - In the tab, start typing 3d print into the search bar. Once the “Mesh: 3D Print Toolbox” shows up, click the checkbox on the far right to enable this add-on.
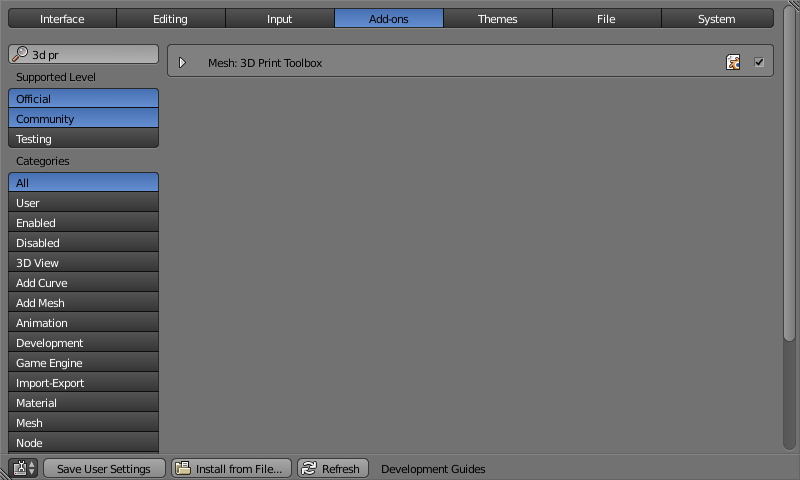
. Check the box on the far right to enable
- Save User Preferences if you want this to be loaded next time you run Blender.
- Close the User Preferences window.
- In the Tool Shelf, there should be a new 3D Printing tab.
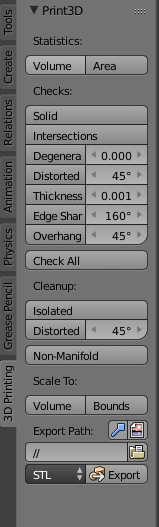
The newly available 3D Printing toolbox
Running the 3D Print Toolbox
This tool checks for the following issues. Images are from the Blender 2.6 docs for the toolbox.
Intersecting faces. Internal vertices will need to be deleted
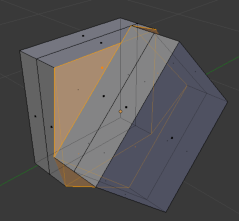
Distorted faces. Triangulation might help this.
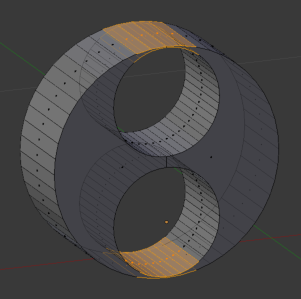
Thickness. A redesign is needed.
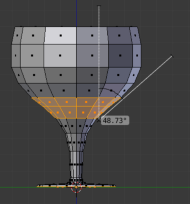
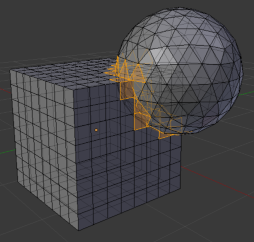
Overhang. Supports can be added (by extruding small parts of the glass’ bowl downwards to Z=0)
Exercise: running some checks in the 3D Print Toolbox
- Set the parameters to match the tolerances of the intended printer
- Enter Edit mode
- Click the button
- The box will show the results. If problematic regions were found, a clickable button will appear in the output. Clicking this will highlight the faces.
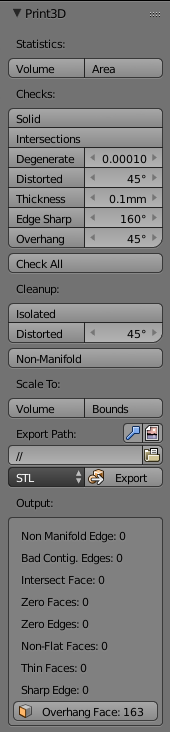
Note the “Overhang face” is a button that can be clicked. Doing so highlights the faces (in face select mode)
Note
There should always be at least some faces flagged as “Overhanging face” since these will be on the build surface of the printer. You will have to evaluate whether any additional overhanging faces warrant fixing.
Mesh Analysis
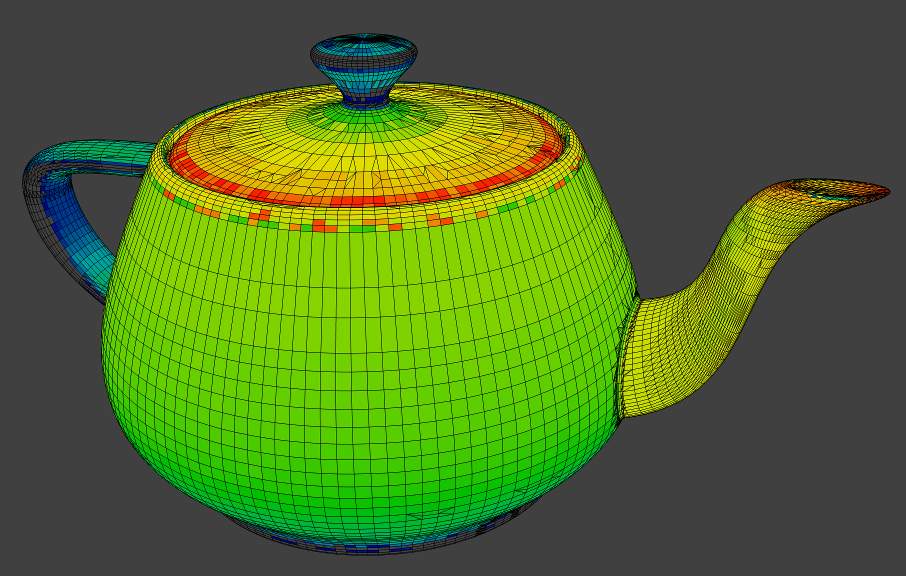
Complementary to the 3D Print Toolbox is the Mesh Analysis panel. Rather than yes/no answers per face, this generates a heatmap of problematic areas. These images are from the Blender Mesh Analysis docs.
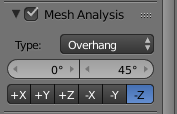
The Mesh Analysis panel, in the Properties Shelf. Must be in Edit Mode to see this

Overhang, with red indicating more problematic areas
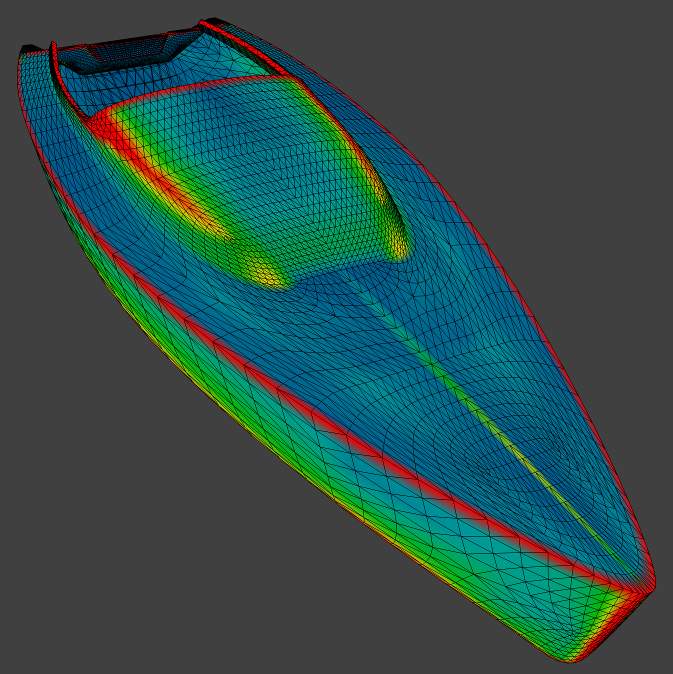
Thickness, red shows more problematic
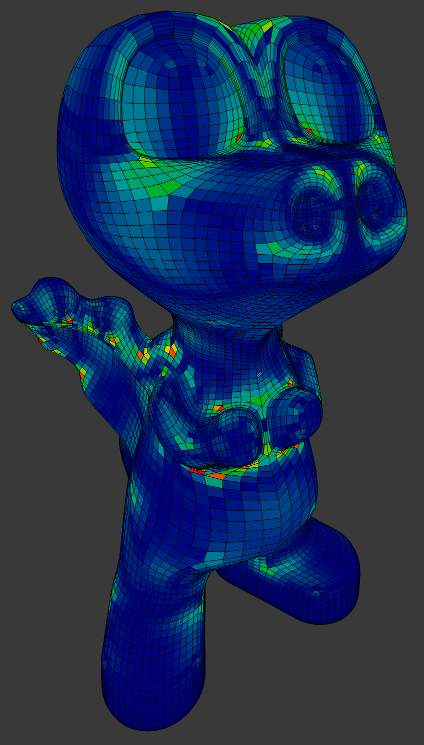
Distortion, where triangulation may have a hard time figuring out how to divide faces.
Like thickness, too-sharp areas can be difficult to print.
Incomplete guide for fixing issues
| Problem | Solution |
|---|---|
| Intersections | Fix geometry by deleting inner vertices |
| Non-manifold | Fill holes (F; may need Ctrl-T as well) |
| Overhanging | Add supports, or move widest face of model to Z=0 |
| Thin | Add geometry or modify original design |
| Sharp, too-small faces | Add geometry or modify design; try tri -> quad ->
tri (Ctrl-T, Ctrl-J, Ctrl-T or
Remesh modifier |
Some useful links with more info on fixing issues:
- Fixing non-manifold models in Blender, from Shapeways
- Creating hollow objects in Blender, from Shapeways
- Tips for modeling in Blender for 3D printing, from Sculpteo